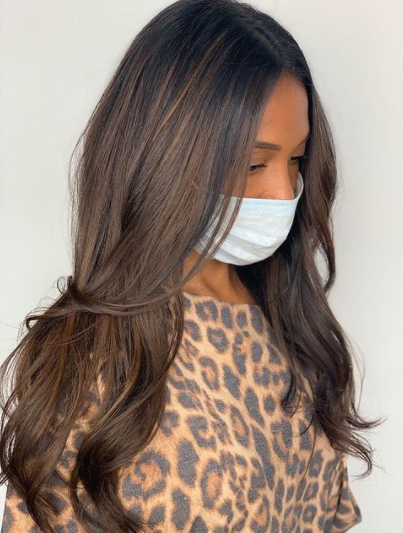
Blowouts are BIG! 5 Tips You Need for this Year
Perfecting a blowout takes a lot of time and practice. We all want that effortless look, but ultimately every girl knows a gorgeous blowout is a work of art.
Having perfect hair makes you feel confident and ready to take on anything! This feeling shouldn’t be something you only get when you leave our hair salon. Our stylists share some tips to help you achieve the perfect blowout at home, so you can show off your smooth and shiny locks anytime you want!

1. Start in the Shower
Blowouts start in the shower?! Yes, you heard us right. A great blowout is only as great as the products you use.
You also cannot have a blowout with dry hair, so since you’re washing your hair anyway, you might as well make sure you are using the right shampoo and conditioner for your hair type and concerns (i.e. color-treated, split ends, frizz, volume, etc.).
Check out our salon-quality line of shampoo and conditioners that help you keep your style at home!
2. Have the Right Tools
Having the right tools at home will make your blowout a lot easier as well as reducing frustration, fatigue, and stress. Getting what you need upfront may be a financial investment but it will pay for itself over time.
Hairdryer
A hairdryer does not have to be a big investment. You will want to make sure it feels comfortable in your grip. If your hairdryer is too big for your hands or too small, or too awkward to hold that will make your blowout more tiring and harder. Make sure it also has a cool setting button and a nozzle attachment.
Related > Ways to Make a Blowout Last Longer
Round brush
Choosing the right size round brush will depend on how long your hair is. The longer your hair is the larger the round brush.
Short hair > 1.5-2” round brush
Medium hair > 1.5-3” round brush
Long hair > 3-5” round brush
Shop online for our collection of professional, high-quality hair brushes at Fabric Hair!
Hair protectant
Before you blow-dry your hair, you will need to apply a heat-protectant product. These products will protect your hair up to 450 degrees F.
We recommend using Melu Hair Shield. This spray should be applied strand by strand to dry or damp hair before blow-drying and protects hair from heat stresses caused by blow driers and straighteners.
Related > Stash Up on Home Haircare
Cut Down on Drying Time: Pre-dry Then Rough Dry
When it comes to blowouts at home, no one wants to spend all morning primping their hair. We all want that “wake up and go” look.
Tip: You should never blow-dry soaking wet hair
To cut down on the amount of time it takes to dry your hair you should first pre-dry your hair then rough dry it (lightly all-over drying with a hairdryer before you start heat styling). This allows cuts down on the amount of time your hair is exposed to heat, which reduces frizz and damage over time.
To pre-dry your hair, grab a super-absorbent microfiber (not cotton) towel and twist your hair up into it. When your hair is no longer soaking wet, detangle your hair, apply your heat protectant product, and start rough drying your hair on medium heat until your hair is about 60-70% dry.
Related > What is Rough Drying? And Why You Need to Try It
4. Section and Style
After your hair is about 3/4 of the way dry, grab your round barrel brush and nozzle attachment for your hairdryer. One of the important keys to achieving a salon-style blowout is to make sure to use the nozzle; this accessory concentrates air and aids in directing the airflow where you want it to go.
As you start sectioning your hair off to blow-dry, make sure you are using the cool setting button. You should not be using the highest heat setting on your dryer.
Sectioning your hair and styling as you go is often the trickiest part for anyone attempting their own blowout. We recommend starting in the front of the head. Part your hair into one-inch sections with clips and dry each section with your round brush with the nozzle pointed downward. This position helps keep the cuticle of the hair smooth.
Related > Do Blow Dryers Damage Your Hair?
5. Finish With the Right Products
You’re almost done! Make sure to finish your at-home blowout with the right products; this will extend the life of your blowout.
Apply a light layer of flexible setting spray after your blowout is complete. You can also add a few drops of shine serum for additional shine or a dime-sized amount of finishing cream onto your lengths and ends to seal in moisture and reduce any frizz.
To maintain your blowout, considering using dry shampoo the next day. Shop our mega volume styling products to maintain your salon style every day!
Get Some Serious Blowout Style
If you still are having some challenges with your at-home blowout, do not worry. At Tribeca Salons, we offer express blowouts and are more than happy to do it for you if you’re near one of our top Tampa, FL salons. We can also work with you virtually to help you feel confident doing it on your own.
Have a group of friends needing a girl’s day out or a bridal party needing their hair done? Whatever the occasion is, we have a private salon suite that can be used for small (safe) parties.
We follow all CDC guidelines and safety protocols to make sure you feel 100% safe during your visit. Call us today at one of our two convenient Tampa locations at 813-250-0208 (South Tampa) or 813-242-4080 (Ybor) or book your appointment online.
